
KNX cable: Why and how?
Upgrading your home to make it smarter can hardly be called a trend anymore, as trends disappear after a while, but some smart home tech is built to last and is here to stay.
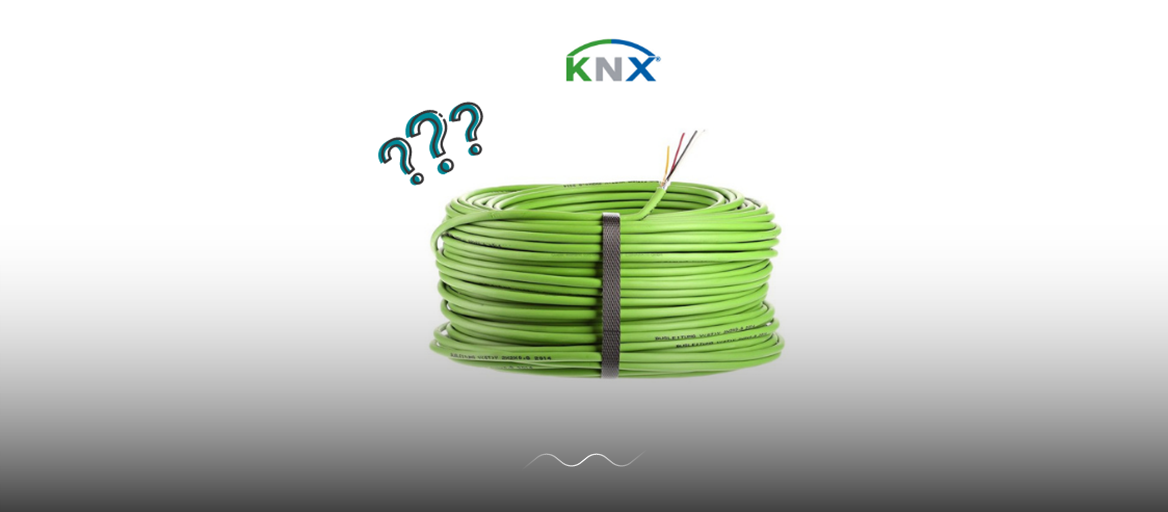
A popular choice for making your home smarter and cost-effective is KNX that has been around for 30 years already. KNX is a worldwide standard for building control, it occupies a large share of the market of bus-based building automation systems. The KNX cable is where the magic happens, however it isn’t the only choice out there.
In this article I’ll be presenting KNX communication systems in-depth (KNX cable, KNX RF, KNX IP and Powerline), alongside the option to add wireless devices with just a couple of clicks.
The key to making a building “smart” is to add sensors and actuators that are connected into the same local network, either with a wire or without it. There are two main ways to do this:
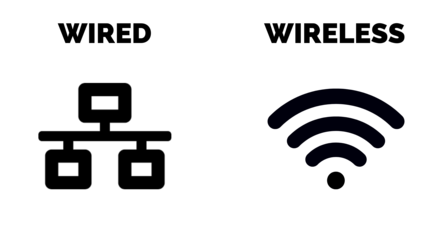
Wired smart home tech:
When it comes to wired connection, I will be focusing on KNX, where wiring can either run next to mains cabling or it runs around the building following a pre-defined topology.
A single KNX line can have up to 256 devices although the actual number depends on the size of the KNX power supply on the line and the total current of the devices. You can also expand the system beyond a single line, with each new line (up to 15) linked to a main line to create an area.
Usually a decentralised KNX tree topology is used to link “smart” sensors and actuators via a KNX cable, where each device can communicate with every other device.
Example: a light switch can tell a dimmer to set it up to 80% brightness, or a presence sensor can tell the actuator for the living room lamp that there aren’t any more people in the room any more so it can turn off.
KNX wiring system allows each sensor and actuator that act upon sensors to be joined together by a bus cable and create a network of possible communications.
Wireless smart home tech:
Wireless smart home tech connects all your devices to the local network, not just your smartphone, any wireless Internet of Things (IoT) device can be connected and communicate with each other over local network or even remotely via an internet connection. You can also connect KNX wirelessly via a KNX RF or KNX IP cable, explained more in-depth below.
Wireless home automation works by deploying low-power equipment that can send and receive information, for example light sensors that detect the rising sun and are automated to open your bedroom curtains.
With the rise of smart speakers and displays, especially those made by the three tech giants: Apple, Alexa and Google, the IoT gadgets and devices have slowly been finding their way into our homes. This is due to their accessibility, drop in price and humanity’s inclination towards green building and saving energy via home automation. From smart plugs, to smart lamps, sensors and speakers, wireless tech has been all the rage in the last few years.
Their biggest benefit is that they’re easy to install, anyone can do it themselves and they can be operated with your smartphone. There are several different wireless protocols; from Bluetooth, to WiFi (most common) and ZigBee (has fewer congestion problems).
The biggest downside of wireless tech is interconnectivity that doesn’t exist yet between brands and you need to have a separate app for each manufacturer. Another downside is lower stability and connectivity issues that arise especially if there are many IoT devices on the same network.
This is about to change with the project Matter that was announced in 2020 (formerly known as CHIP) that plans to join a lot of manufacturers and protocols under one roof. Matter plans to support Alexa, HomeKit, Google Home, as well as Ethernet, WiFi, Thread and Bluetooth LE.
In May 2021 they announced to move forward with the project. More about the current status of the Matter project can be found HERE.
Let us explain the pros and cons of each option for raising the IQ of your home in the next step.
The pros and cons of KNX wiring
PROS:
- Complete reliability with no connectivity issues
- Fast execution of devices
- Built to last 30+ years
- Easy to add other KNX-certified devices where KNX cable is installed
CONS:
- Costs a lot when building or adapting
- Costly to adapt or extend after you’ve moved in
- Can’t be operated with a mobile app out-of-the-box
- Requires a certified KNX professional to install it
- You can’t manage the installation yourself
The pros and cons of wireless technology
PROS:
- Relatively cheap
- You can easily install it yourself
- Can be controlled with a mobile app out-of-the-box
- Most of them offer voice control
- Lets you automate your home easily with a mobile app
CONS:
- The lifespan of each device is around 5 years
- Unreliable if the internet connection is slow or WiFi router isn’t good enough
- Devices from different manufacturers aren’t interconnected (yet)
- Doesn’t work reliable (yet) in big installations with many devices
While KNX isn’t the only bus technology on the market, it’s the one that is supported by a huge number of manufacturers (500+), far more than any other standards. This, and the pros mentioned above, are the reasons why we suggest KNX to every smart home owner.
If you’re curious about the price, you can check out the KNX Cost Calculator that will give you an estimate for your house or apartment.
KNX was developed at first to meet the needs of big, industrial installations and buildings and was only later used for smaller residential projects. The KNX wiring can easily handle the communicational traffic load of a huge building and can thus easily serve a residential building as well. In theory, one KNX system could consist of 50.000 devices, as long as a specific topology is put in place.
KNX products are tested for conformity regularly by independent test laboratories and each product is compatible with any other KNX-certified product. The KNX connects them all.
The functions of the home are easily configured in the “Engineering Tool Software” (ETS) and can be modified or adjusted at any time by a certified professional.
KNX supports different types of communication mediums, which makes it convenient for installing in new buildings or retrofitting old ones. It’s the only bus system to offer such a wide variety of communication media that can be mixed with one another.
The supported communication media are: KNX TP cable (Twisted Pair cable, based on a standard 2-wire bus cable), PL (PowerLine, uses existing 230 V mains network), RF (Radio Frequency) and also Ethernet (IP cable).
Let me present each type and what makes them great:.
1. KNX Twisted Pair Cable (KNX TP)
This is the KNX cable that I’ve been hyping from the beginning of the article. This type of a KNX wire is the most common medium for KNX installations, it has two cores that are twisted together, as the name suggests, covered by a layer of polyethylene (PE) shell. This kind of KNX wiring is simple to install and cost-effective. It’s job is to enable communication between the actuator and the sensors, and also to provide power to the bus line.
It looks like this:
The TP KNX cable comprises solid-core wires and comes in both single or two twisted pairs variations. The red and black are used for signal transmission, and the yellow and white wires provide extra power if required, but are generally not used.
It’s generally used for new installations, large-scale refurbishments or high-level communicational needs of big buildings.
When installing it, the KNX/EIB cable usually runs next to mains cabling and it can be run at the same time by the site electrician. It can be installed with free topology (star, line, bus and tree are the most common methods), the only restriction is that a loop shouldn’t be created at any spot of the bus. The recommended form is a daisy chain because it makes fault finding and maintenance easier.
Power-wise the bus devices can handle voltages from 21 V to 30 V, so a 9 V tolerance range is available in the KNX wire. Regarding data, the transfer rate is 9,600 bits per second and it travels in series of one byte at a time. The information that is exchanged via the KNX cable are called telegrams, which consist of sequences of eight 0’s and 1’s to form a field. Each KNX TP telegram has four fields:
The telegrams travel down the KNX cabling when an actor or sensor being triggered sends it further to trigger a light, sometimes more than one at a time. To avoid collisions during transmission, the telegrams are prioritised based on a CSMA/CA (Carrier Sense Multiple Access/Collision Avoidance). The KNX installer pre-defines which telegrams have priority in case of collision.
The main benefit of the TP cable is that any bus device can be disconnected from it without disturbing the whole data transmission line. This is due to the fact that each device is connected via bus terminal, it looks like this:
The unit of a KNX TP installation is a line, which includes a power supply and up to 64 bus devices. The KNX wiring can be laid as desired, with other branches of devices being added anytime later. This extremely flexible topology is called a free tree structure.
It isn’t limited to 64 devices as it can be extended with a line repeater to add another 64 bus devices. With three repeaters being the maximum in one line, the maximum number of devices is 255. The other way of expanding the installation is to create new lines with line couplers.
The KNX cable lengths are limited to ensure fast and reliable communication (the voltage drops with length of cables), here you can see why huge industrial building technology systems can easily be handled with coupling KNX TP lines.
- Distance from device to power supply: max. 350 m
- Distance between two devices in a line: max. 700 m
- Length of a line segment: max. 1,000 m
2. KNX Powerline (KNX PL)
Using the existing electricity cables is a great and cost-effective way to retrofit an apartment with KNX, since there is no need to lay a dedicated bus cable.
This means that no additional power supply is needed, as it comes from the apartment’s 230 V mains electricity grid. The data transfer is 1.200 bits per second and comes in the form of a telegram. KNX PL telegrams are extended KNX TP telegrams and work in a similar way.
The topology is similar to KNX IP cable, it’s made up of lines and areas. An area is made up by coupling 15 KNX PL lines using KNX TP cable. To avoid collisions between telegrams KNX PL (like KNX TP) requires the bus access to delay some of the telegrams and prioritise others.
It works like this: The default state of all bus devices is receive mode; only if certain conditions are met are they able to switch to sending mode. If a device detects the bit string of a preamble, this indicates to it that the bus is occupied by another device. A differentiation is made between the two states Bus occupied and Bus blocked.
If a device receives a Bus occupied signal, the transmission of its telegram is postponed until a later point in time, chosen at random from one of seven possible options. This hugely reduces the likelihood of collisions occurring.
Source: https://www.knx.org/wAssets/docs/downloads/Marketing/Flyers/KNX-Basics/KNX-Basics_en.pdf (page 8)
3. KNX Radio Frequency (KNX RF)
In situations, where it’s not possible to lay new KNX cabling in the building, KNX RF is also a viable option for sending data, it’s also regularly used to extend KNX TP wiring. This allows the devices to be controlled wirelessly, while each device is powered by batteries. The communication is held in the form of multicast telegrams. This means that a single telegram can be received and read by several devices at the same time and for example switch on several lights simultaneously.
Radio technology in general works by modulating a carrier wave with the information that needs to be sent. This can be done by modulating either its amplitude, frequency, phase or a combination of them. The signal is then sent to the receivers which recover the information from it.
KNX RF uses frequency modulation where the logical states zero and one are produced by slightly modifying the frequency of the carrier wave, also known as the centre frequency. Choosing the correct centre frequency determines the transmission performance.
There are two upwards-compatible versions of KNX RF – KNX RF Ready and KNX RF Multi.
KNX RF Ready: the centre frequency is 868.3 MHz, and only one communication channel is available. The downside is that it’s vulnerable to interference from non-KNX radio systems closeby due to only one channel being available.
KNX RF Multi: it overcomes this interference by enabling devices to switch from an occupied channel (e. g. F1, which is identical to the channel used by KNX RF Ready) to a different radio channel, i. e. ideally two other fast channels (F2 and F3), or two slow channels (S1 and S2).
The fast channels are intended for applications operated by humans (lights, blinds) while the slow channels are for devices that do not need to be permanently in receive mode (HVAC control systems). Fast channels have a data rate of 16.384 kbps, slow channels only half of that.
With KNX RF, the devices don't need to be arranged hierarchically and can be installed anywhere as long as they are within range of the RF line coupler.
4. Ethernet (KNX IP)
Ethernet or IP connection is used for combining different KNX areas in the local network, particularly in conjunction with the internet connection.
Even though IP communication is growing in popularity, the KNX TP cable is still more energy-efficient and offers more flexibility in linking and unlinking sensors and actuators. KNX IP can be used instead of main and area lines of TP cables, provided you have a KNX IP Router that would router the KNX telegrams.
The maximum length of the ethernet cable is cca 100 m.
The communication protocols used are the TCP/IP group of protocols, which also includes the UDP protocol. The TCP protocol establishes a permanent, error-checked connection and ensures that all data packets are sent in the correct order and successfully reconstructed by the receiver (connection-oriented protocol). The UDP protocol is used for applications (e. g. audio and video streaming) in which it is acceptable for data packets to occasionally go missing.
The KNX system uses two Ethernet communication methods → tunneling and routing, both use the UDP protocol. Tunneling is used to access the bus from a local network or the internet for purposes of programming the KNX installation. Routing is used for exchanging telegrams over an Ethernet network, e. g. to couple two KNX TP systems via Ethernet.
More about IP communication via a KNX IP Router can be found HERE.
Integrate IoT wireless technology into a wired KNX home
While we suggest KNX for home automation, stability and flexibility, we feel it’s important to keep your home future-proof and gain independence in managing your home automation.
This is why we have developed a solution that bridges the gap between KNX and wireless devices. With the help of our devices: 1Home Bridge (KNX certified) or 1Home Box you are able to integrate Apple HomeKit, Amazon Alexa or Google Home platforms into your KNX.
This means that your KNX devices will get imported into the Apple Home, Amazon Alexa or Google Home mobile app to be controlled with tapping or voice commands. This integration also allows you to add any compatible wireless IoT devices, such as Philips Hue lamps, IKEA Trådfri devices, Sonos speakers, Apple Watch, Nuki smart lock and thousands more.
Here’s how to connect:
Happy smart homing!